Seeded Sourdough Loaf Bread
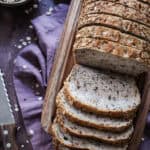
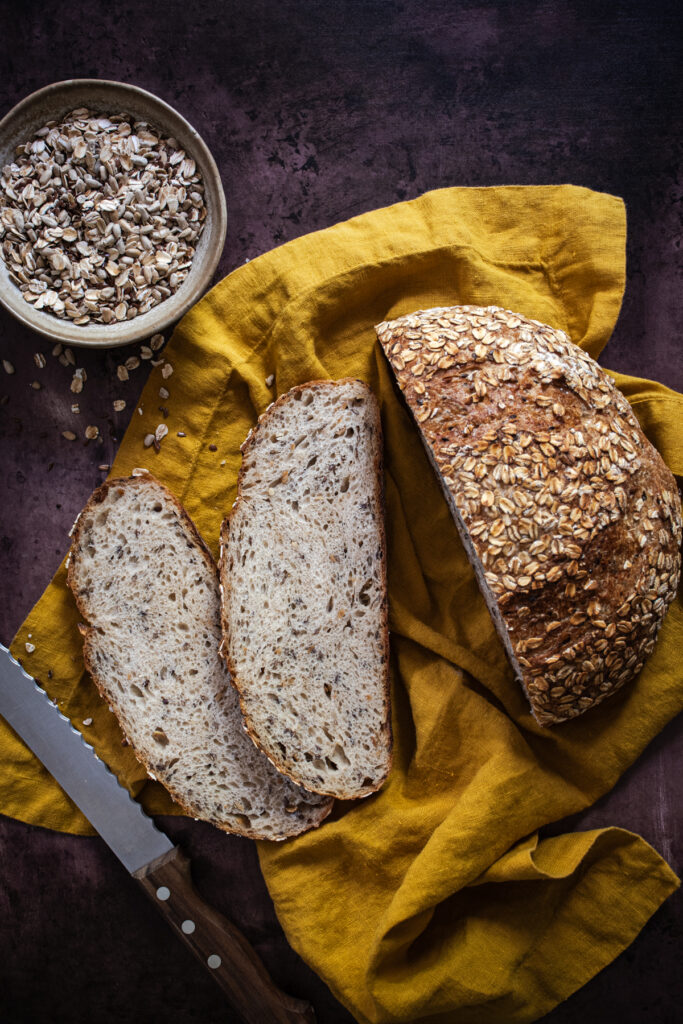
This Seeded Sourdough Bread recipe is foolproof, trustworthy, and absolutely fantastic. Not dense or heavy like many seeded loaves, this recipe delivers on flavor and texture, soft and fluffy with a nutty flavor and perfect amount of crunch. It can be made in a loaf pan (my favorite) or as a freeform round loaf.
- Yield: 1 loaf 1x
- Category: Sourdough
Ingredients
For the seed soaker-
100 grams boiling water
35 grams old fashioned oats, plus more for crust
35 grams sunflower kernels
30 grams whole flax seeds
2 teaspoons fine sea salt
150 grams active starter
For the autolyse-
235 grams water, lukewarm
325 grams bread flour
75 grams golden wheat flour or whole wheat flour
2 tablespoons softened butter
Instructions
Day 1, Evening:
-Feed starter to yield 150 grams. Let starter activate overnight at room temperature.
-Prepare seed soaker. Combine oats, seeds, and salt in a heatproof bowl. Add boiling water and stir to combine. Cover and let rest overnight at room temperature.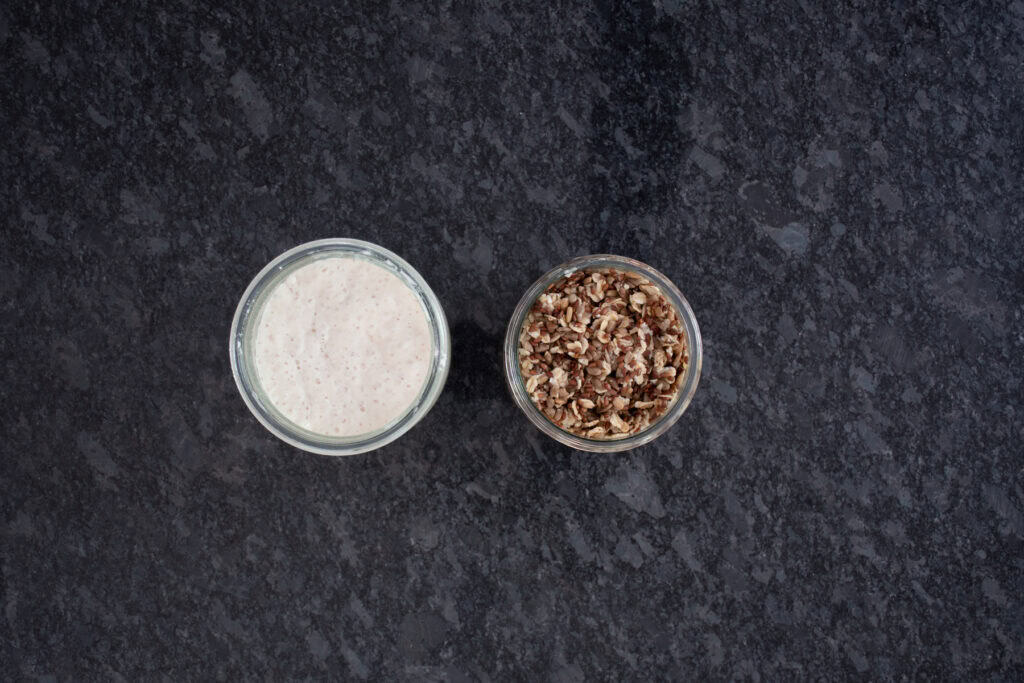
Day 2, Morning:
-Prepare the autolyse. In the bowl of a stand mixer fitted with the dough hook, mix the 235 grams of lukewarm water, 325 grams bread flour, and 75 grams of wheat flour until no dry pockets of flour remain. Scrape down bowl. Cover and let rest in a warm spot for 1 hour.
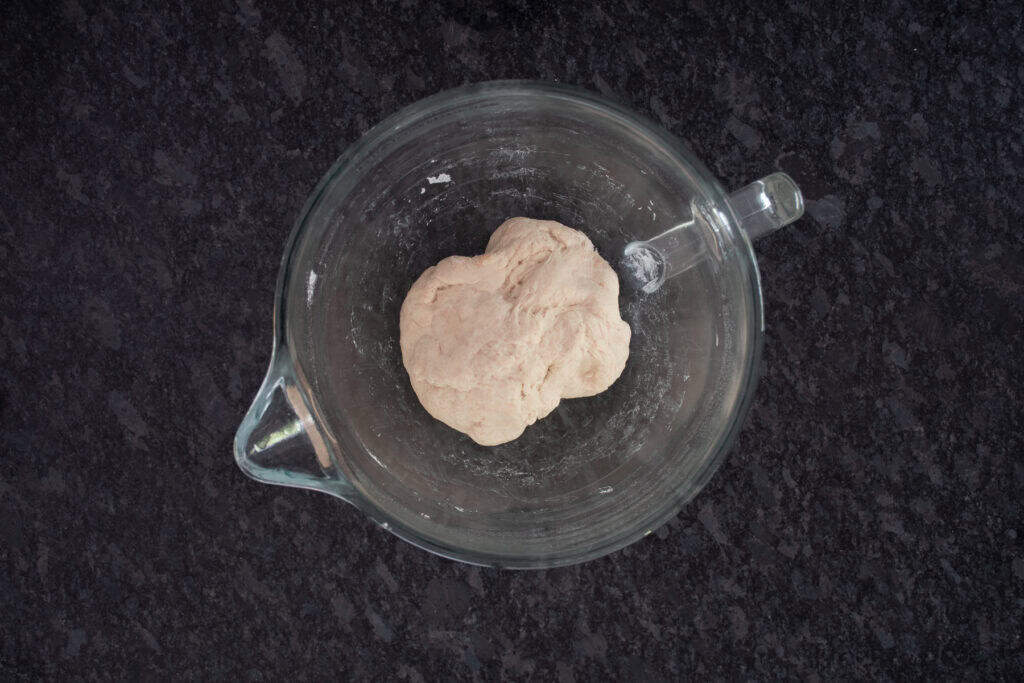
There will not be any yeast activity during this process, just protein development while also giving the flour the first chance at absorbing the water before adding the remaining ingredients. At the end of the hour the autolyse should be quite stretchy.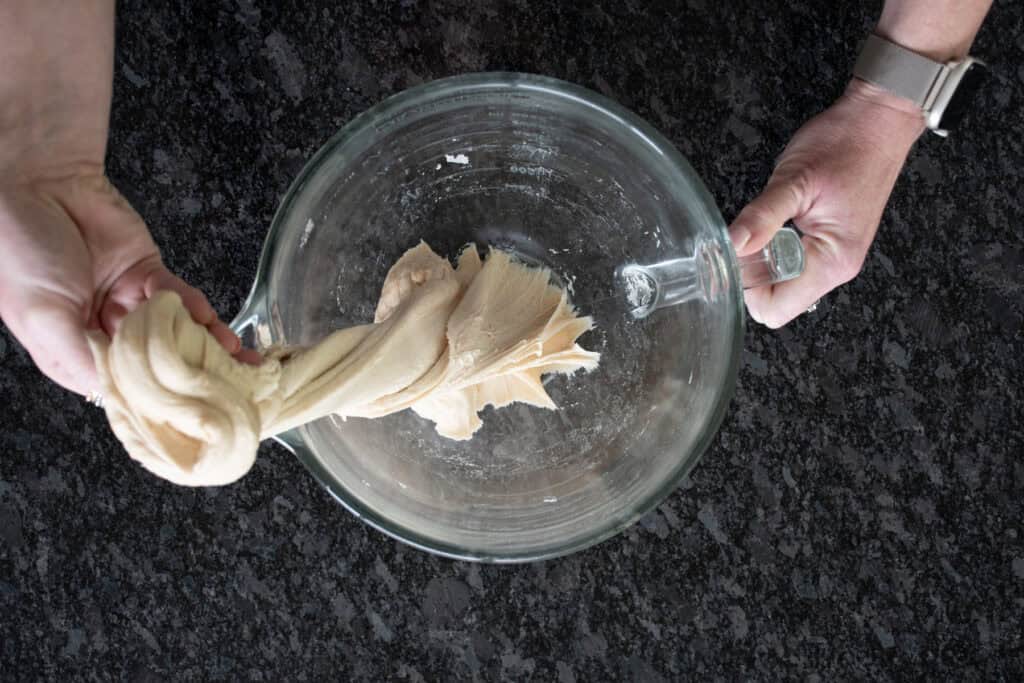
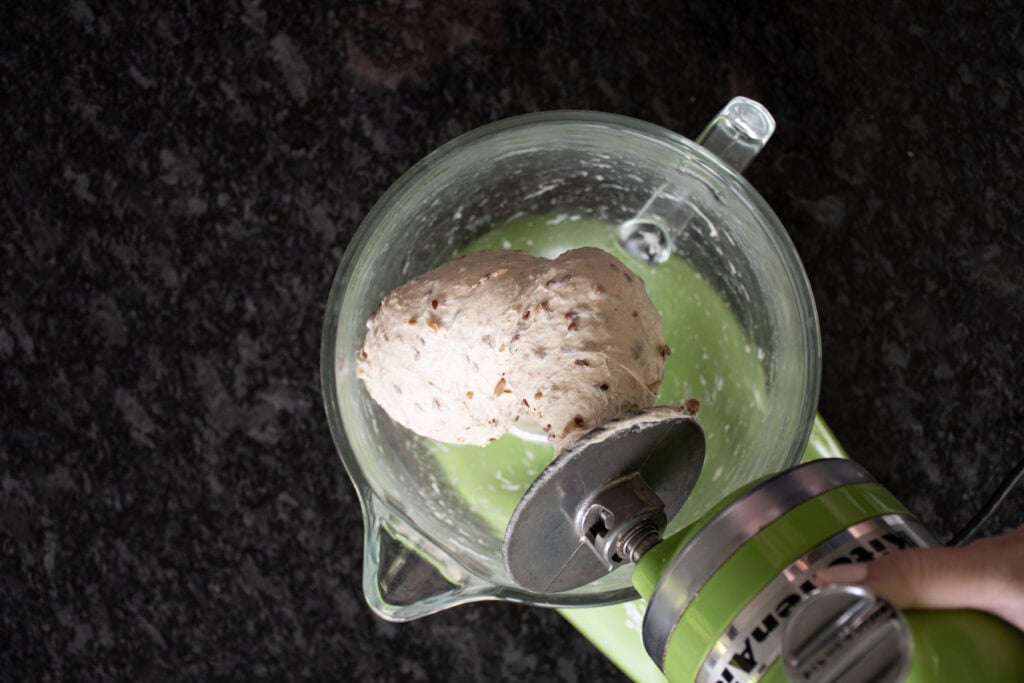
-Mix the dough: Add seed soaker, sourdough starter, and softened butter to the mixer bowl and mix on low speed with the dough hook until combined. Dough will be very sticky at this point. Increase speed to low/med and let mix for 7 minutes until dough has strengthened and the sides of the bowl are clean.
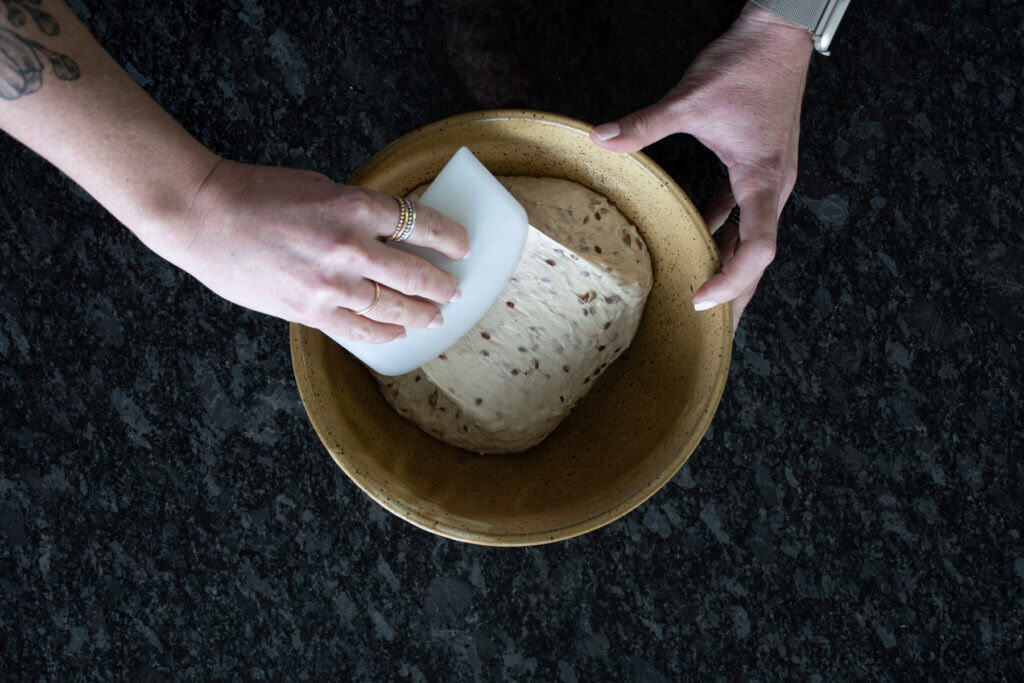
-Bowl folds. Transfer to a large bowl sprayed with nonstick spray. Cover and let rest 30 minutes, then do a set of bowl folds by using a bowl scraper and pulling the outside of the dough over the center, repeating 3-4 times working clockwise around the bowl. Cover and rest 30 more minutes and repeat bowl folds for a total of 3 set of bowl folds at the 30, 60, and 90 minute mark.
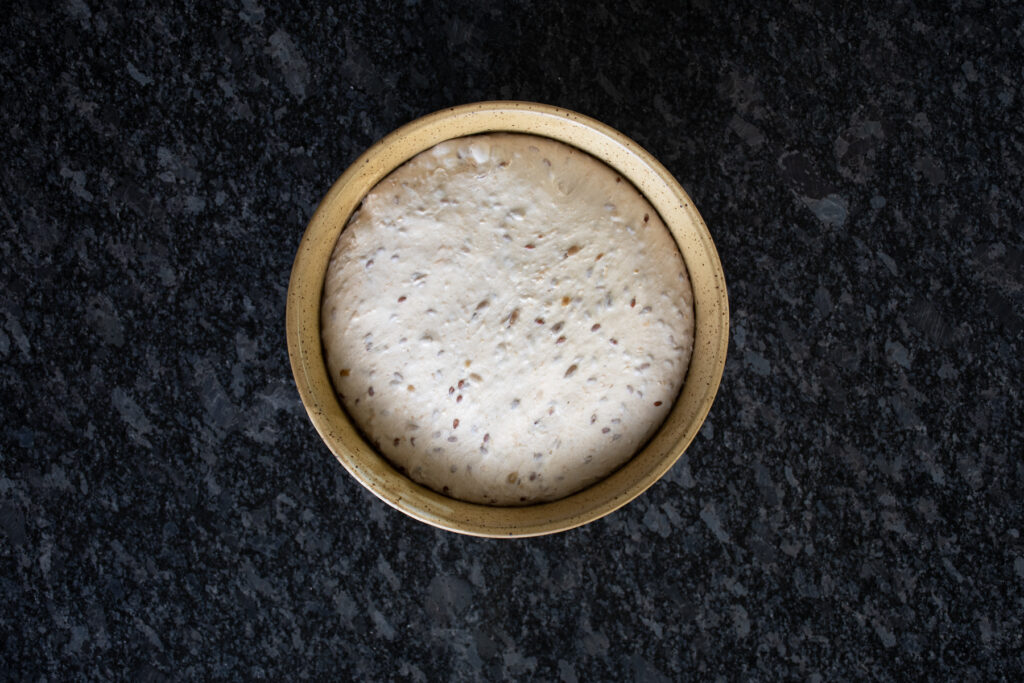
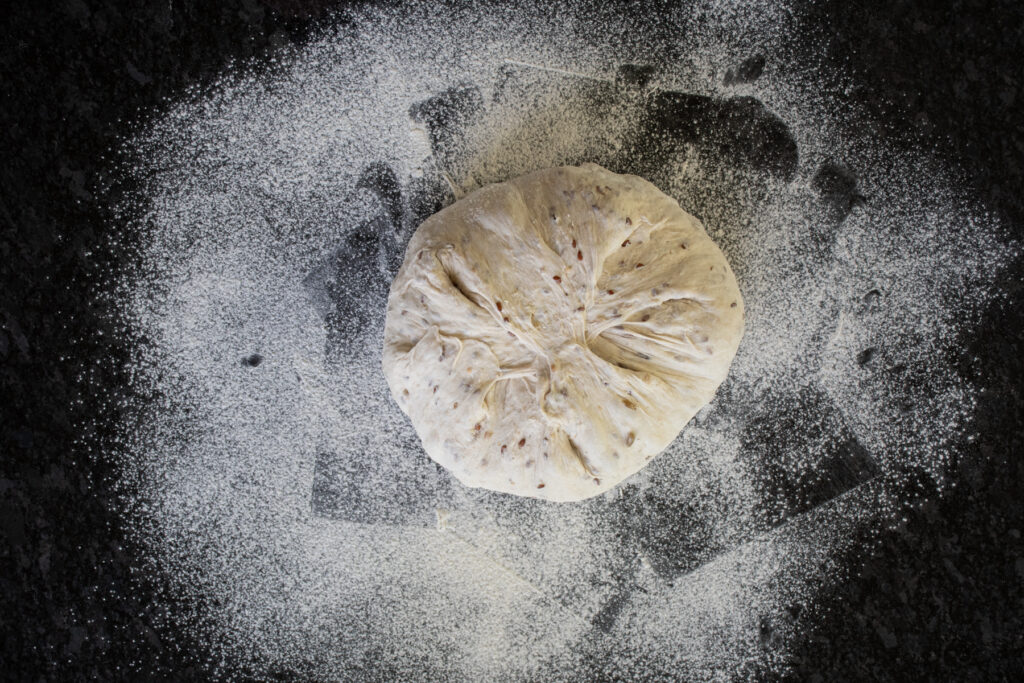
-Bulk fermentation: After the last bowl fold (90 minutes after mixing the dough), cover dough and let proof in a warm spot for 2-3 hours until risen and very jiggly, bubbly, and not sticking to the bowl. Be sure to stop bulk fermentation before the dough seems so delicate that it could deflate if jostled.
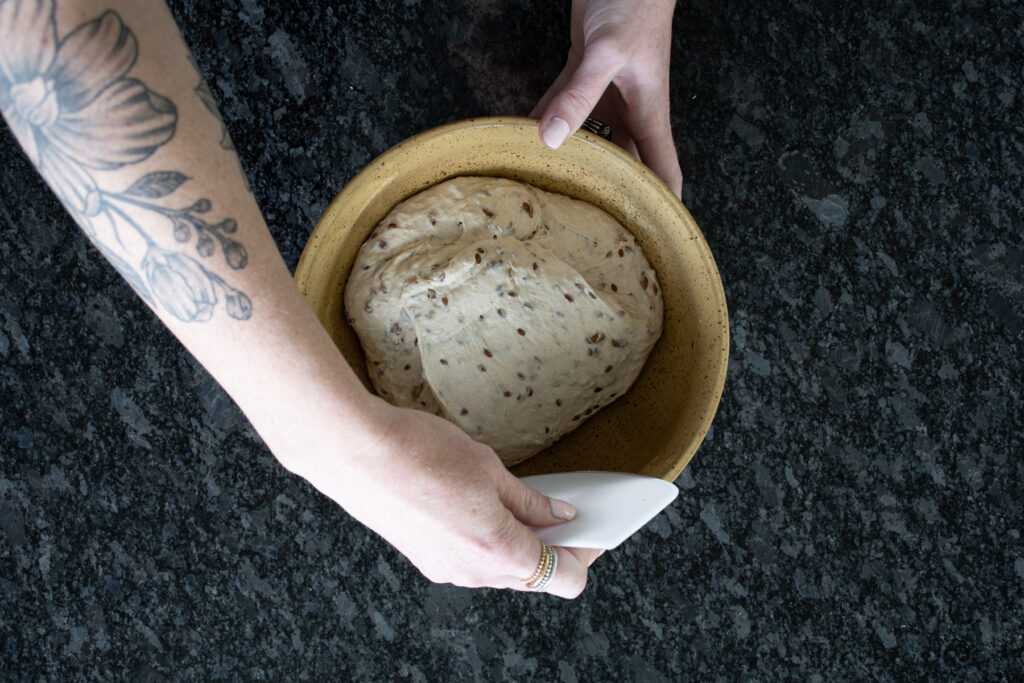
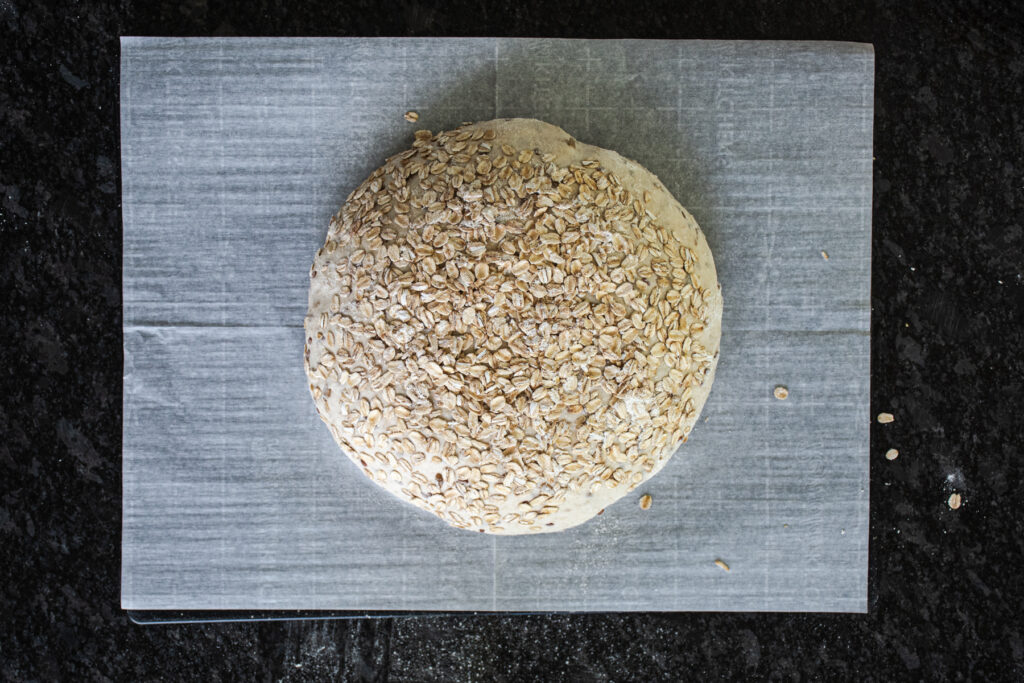
-Gently transfer dough to a floured surface. Try not to deflate the dough too much. Popping any huge bubbles is perfect, just don’t punch the dough down. Pre-shape into a round by using a lightly floured dough scraper and pulling edges toward the center and working your way around the dough clockwise. Cover with a large bowl turned upside down, then let rest for 15 minutes before final shaping.
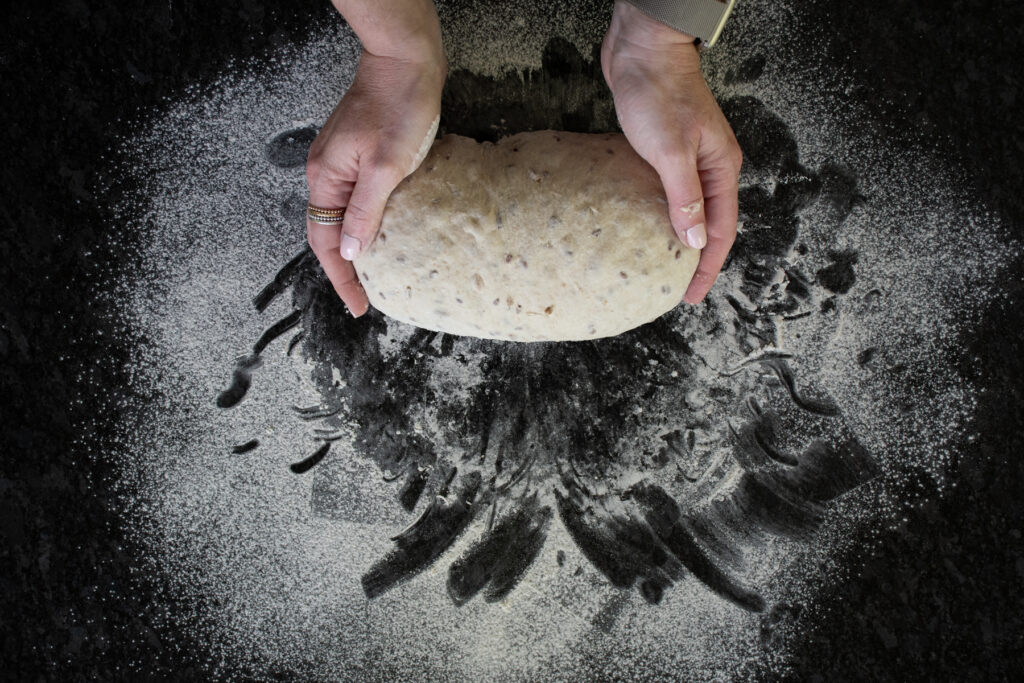
 -Final shape. (Decide between freeform loaf using a banneton basket and Dutch Oven, or using a loaf pan. My preferred method is the loaf pan.) Shape into a round loaf for a Dutch oven or an oblong loaf for a loaf pan.
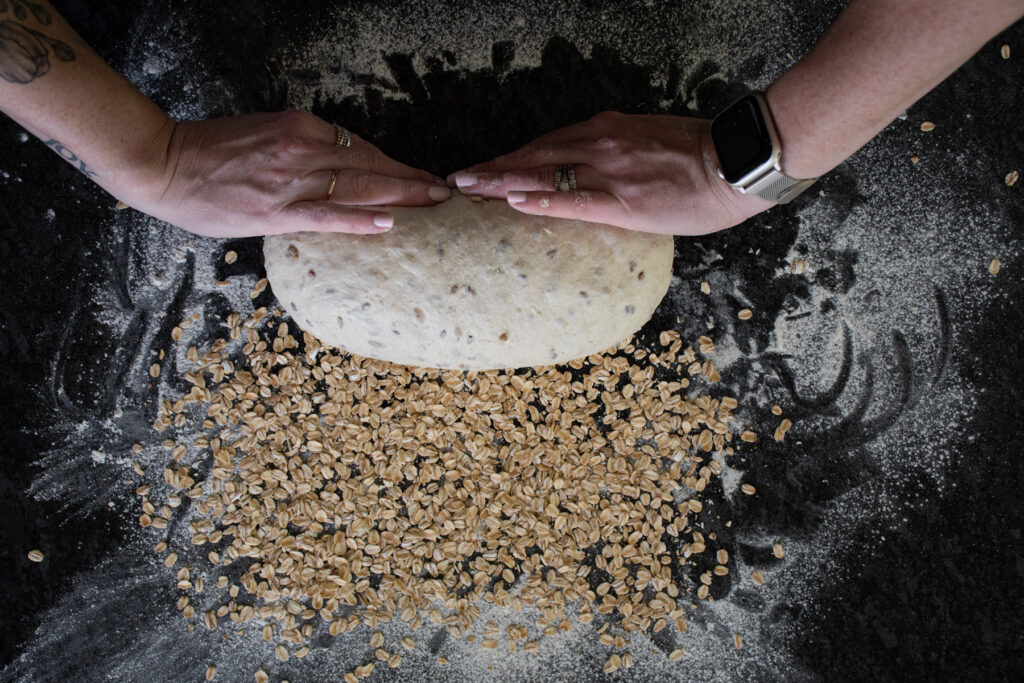
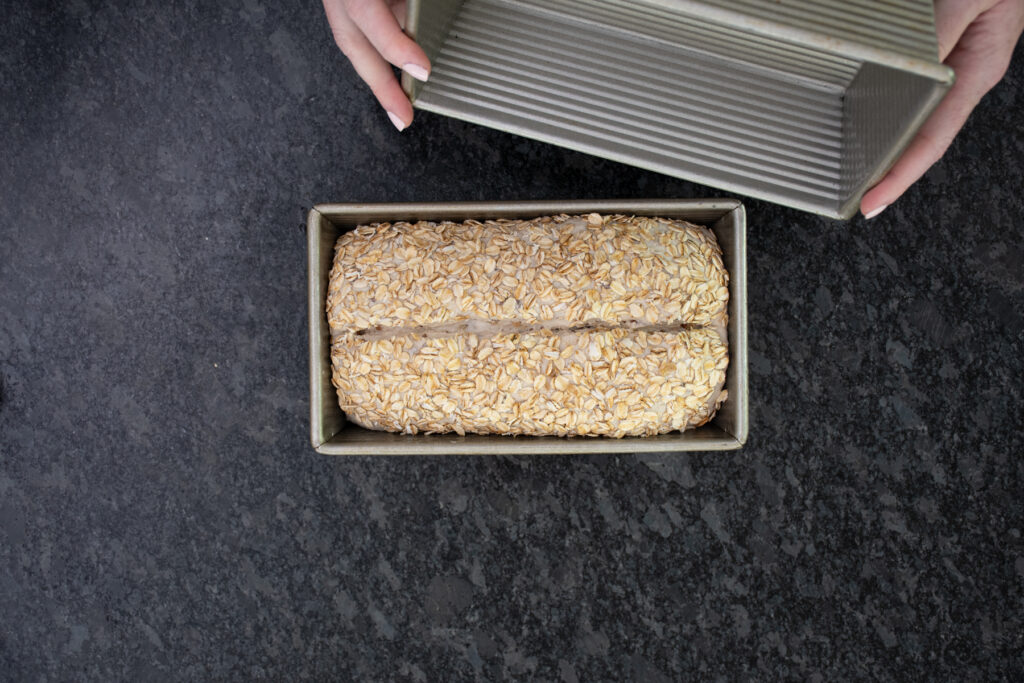
-Spray/mist the shaped loaf surface with water, then sprinkle oats on the counter next to the loaf. Roll the loaf onto the oats to coat the surface evenly. Transfer to a banneton proofing basket lined with a tea towel dusted with flour, or to a loaf pan sprayed with nonstick spray. Cover and let proof at room temperature for 1 hour, then transfer to the refrigerator to cold proof overnight.

Day 3, 1 hour prior to baking:
Loaf pan method- (See notes at the bottom of the recipe for using the freeform loaf method.)
-Remove dough from refrigerator to allow to come up to room temperature for a bit while the oven heats. Dough should be a bit rounded and puffed up near the top of the loaf pan but not necessarily doubled. It will spring up in the oven.
-Preheat oven to 425°F for 1 hour.
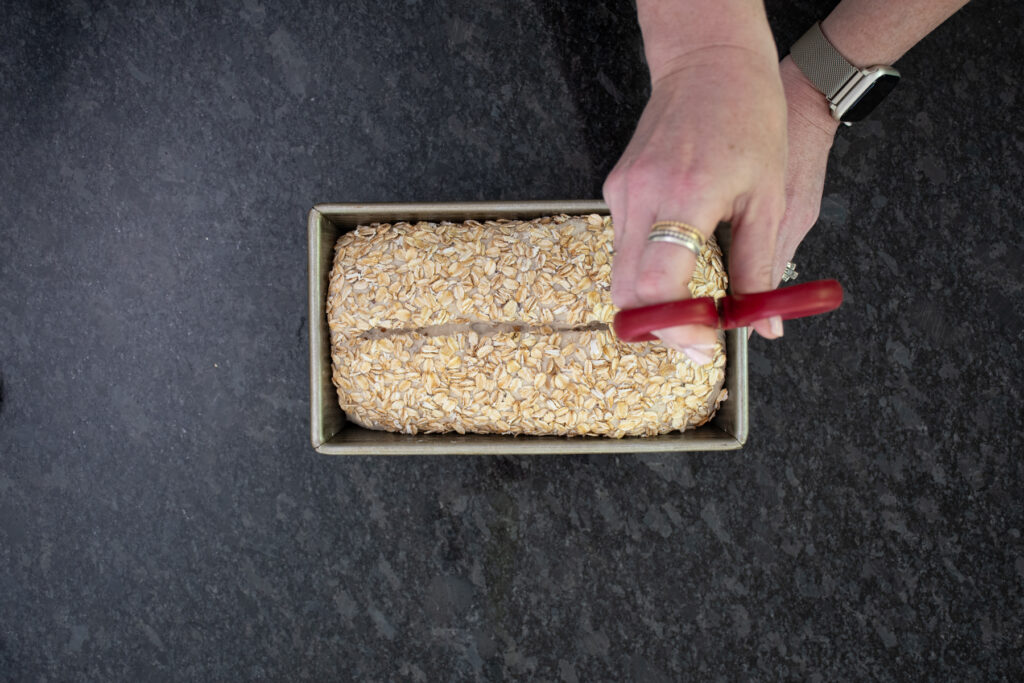
-Score the surface of the dough down the center lengthwise using kitchen shears (a knife or lame doesn’t cut through the oats well). Be sure to cut about 1 ½ inches deep to allow for expansion.
-Spray surface with a mist of water, then top loaf pan with an inverted loaf pan as a lid.
-Transfer to oven, making sure the pan you’re using as a lid is lined up properly. Reduce heat to 375°F and bake covered for 20 minutes.
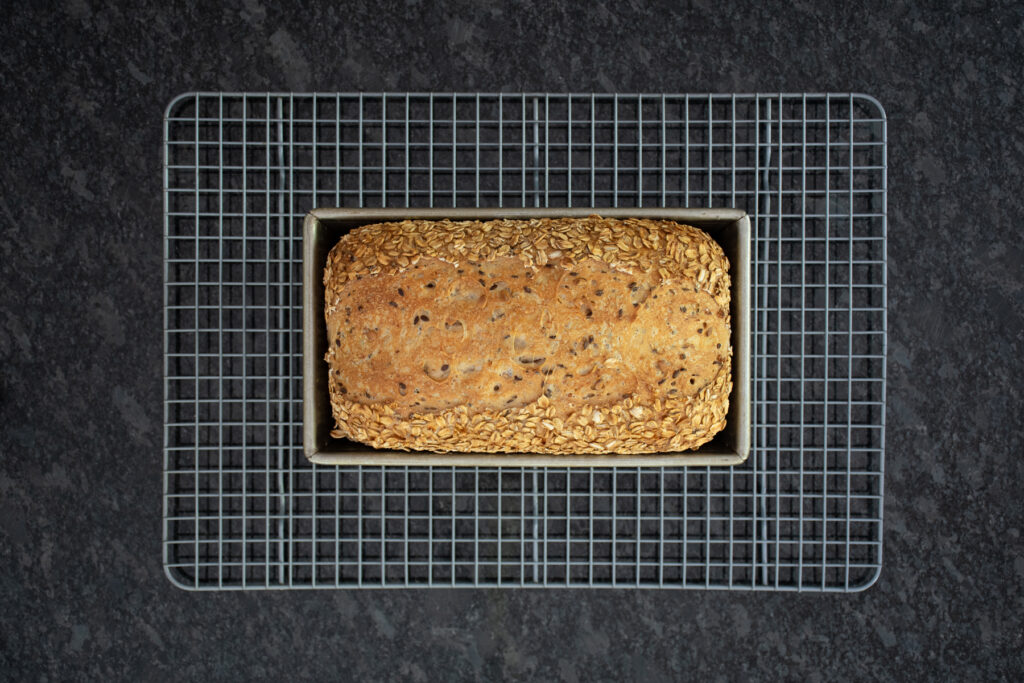
-Remove the “lid” from the loaf and bake an additional 22-25 minutes until golden brown.
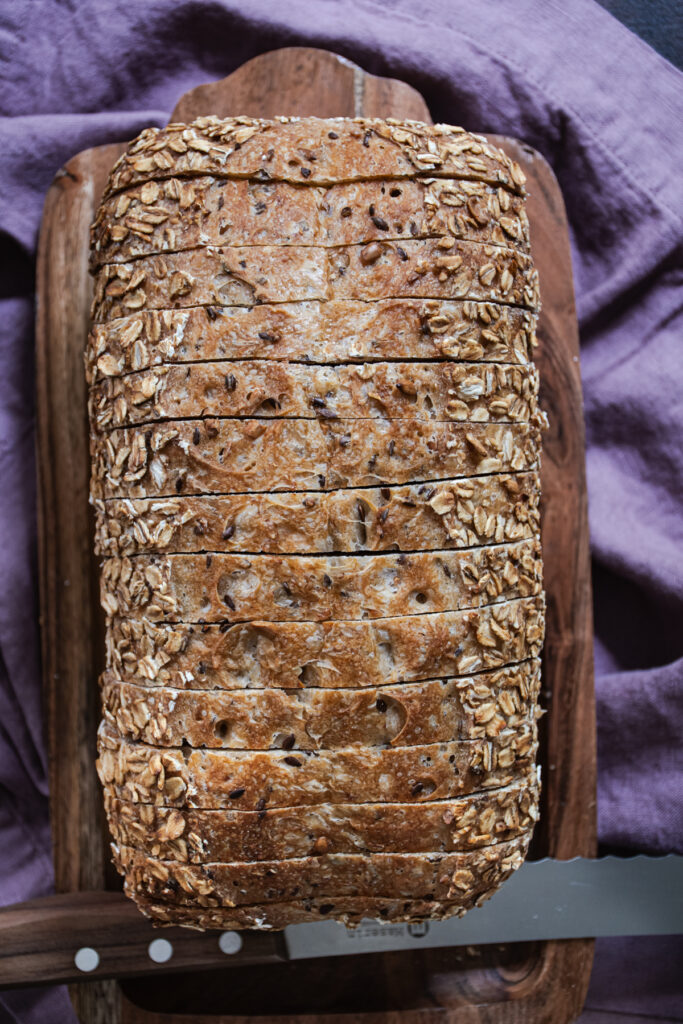
-Transfer to a wire rack to cool completely before slicing.
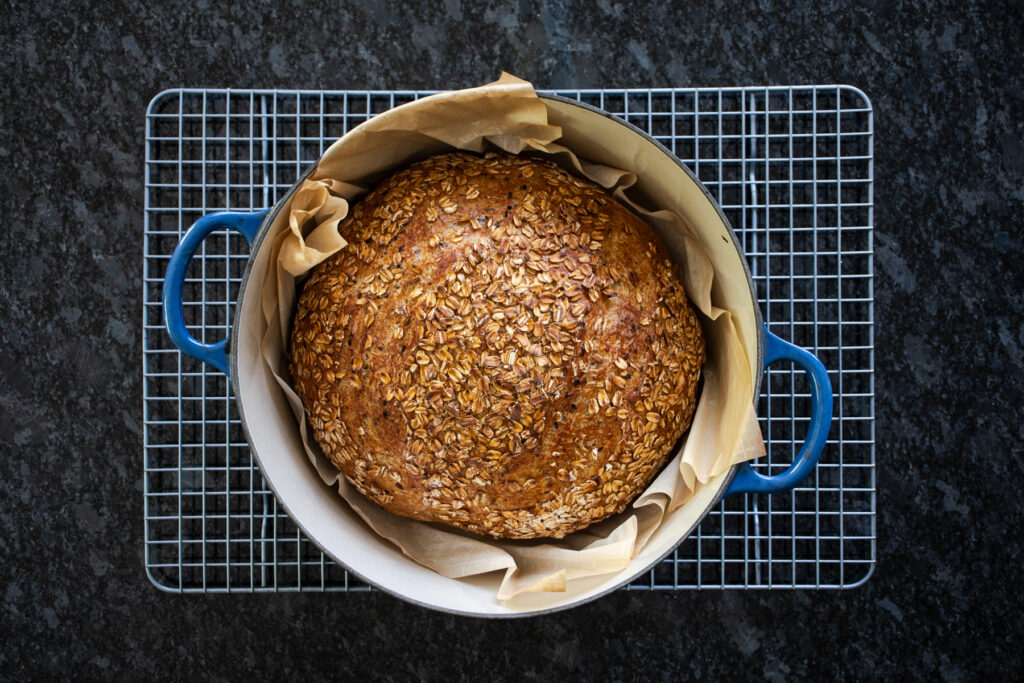
Freeform loaf using a Dutch oven method-
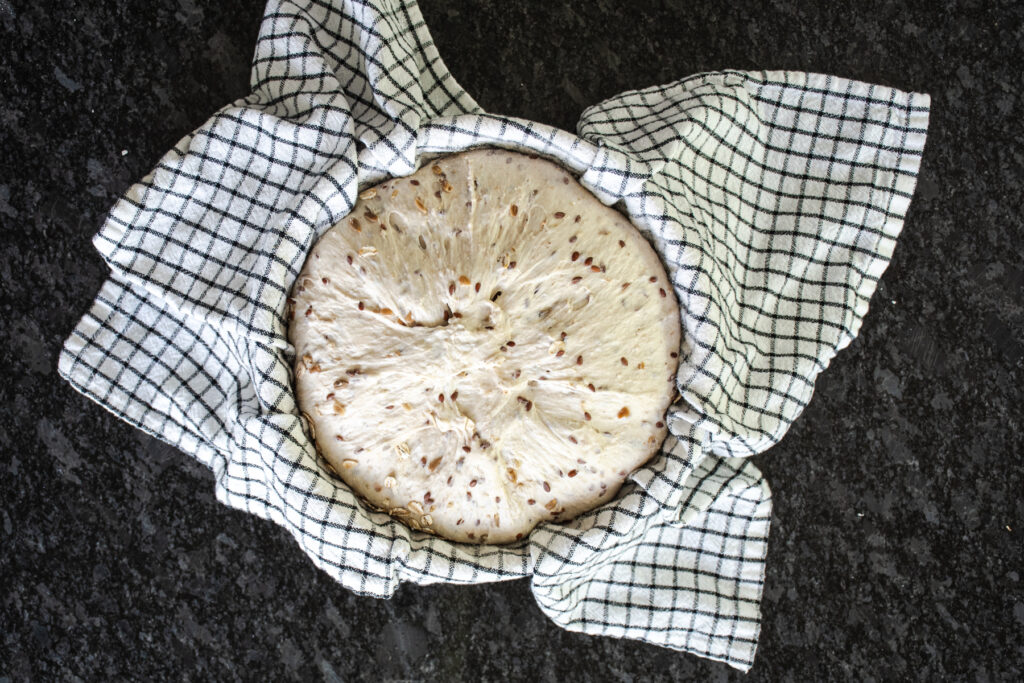
-Day 3, Morning: Remove proofing basket from the refrigerator and let come up to room temperature while oven preheats.
-Place a Dutch oven and its lid into the oven and preheat to 500°F for 1 hour.
-Once the oven is preheated, lay a piece of parchment paper over a pizza peel or cutting board so you can flip the dough out of the basket onto the parchment paper.
-Use kitchen shears to score the loaf about 1 ½ inches deep. An X shape or 2 rounded line running lengthwise work well. (A knife or bread lame don’t cut through the oats well, so kitchen scissors work much better for this recipe.)
-Use the parchment as a sling to transfer to the preheated Dutch oven. Before covering with the preheated lid, spray the loaf generously with water before closing the lid over the dough.
-Lower temperature to 475°F and bake covered for 20 minutes. Remove lid and lower temperature to 450° to bake uncovered for 20 minutes until golden brown.
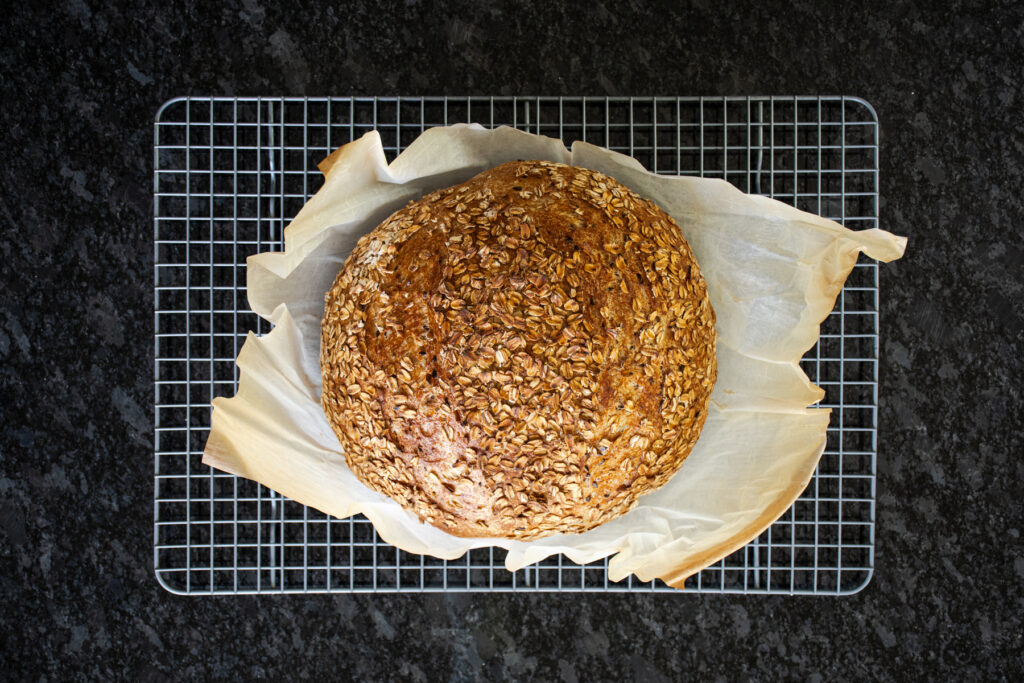
-Transfer to a wire rack to cool completely before slicing.
Keywords: seeded sourdough loaf, flax seeds, oatmeal, sunflower kernels
Find it online: https://kitchenjoyblog.com/seeded-sourdough-loaf-bread/