Welcome back, friends and fellow sushi-lovers. Following up on my last post for Homemade Sushi Rice + Sushi Vinegar, today we're going through how to assemble sushi rolls at home. I'm also sharing my recipe for eel sauce. Spoiler alert: Eel sauce does not contain eel. It's often served on eel, which is how it got that name. Rest assured, Eel Sauce is simple to make and elevates the flavor and presentation of your Homemade Sushi Rolls. Trust me. You'll be incorporating Sushi Sunday into your family's meal plans in no time.
My husband Michael and I took a sushi-making class while on a vacation this summer. We've attempted sushi at home many years ago, but the rice was something that sort of stumped us. I'm happy to report that we don't have that problem anymore! (Perfectly Sticky Sushi Rice Recipe HERE) We got to experience hands-on techniques and practice under the guidance of a trained sushi chef, which was great fun, but such a valuable skill that we brought home with us too. Those are my favorite types of dates to enjoy together. We rarely get the chance to go on dates these days with busy kids, book events, and his crazy travel schedule, so when we do get some time it's fun to do something a little bit different than a typical dinner and a movie.
How to Assemble Sushi Rolls-
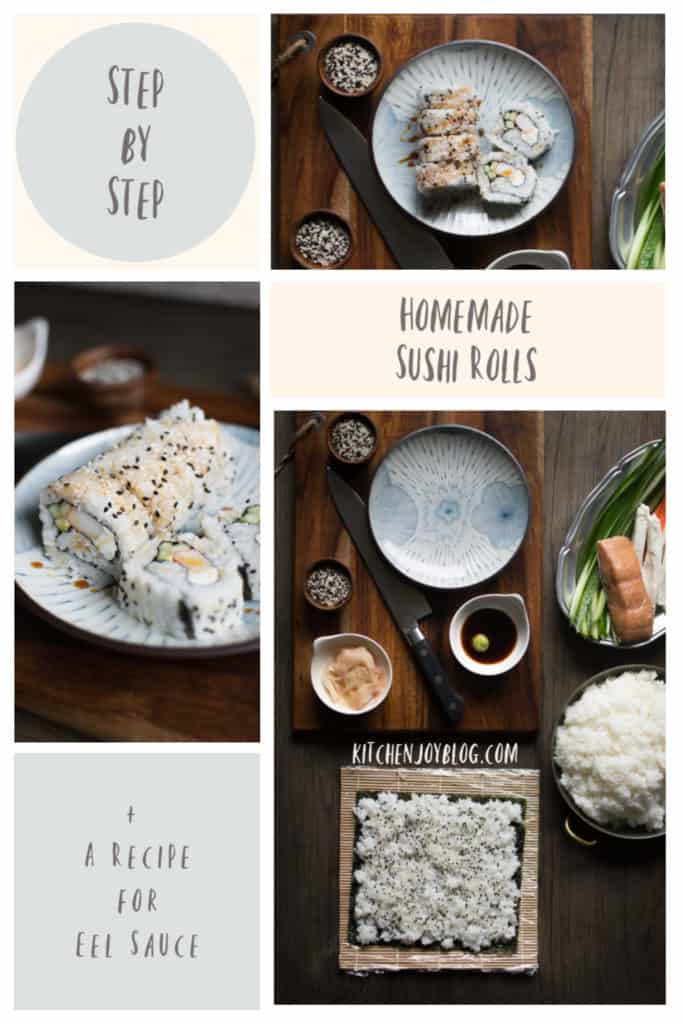
- Prep and gather all of your ingredients and supplies.
You will need:
- Sushi rice, prepared and cooled to room temperature
- Bamboo mat (I like to wrap mine in plastic wrap- much easier cleanup and I find that it rolls better for me
- Nori (roasted seaweed sheets)
- Fillings of your choosing. Our go-to's include smoked salmon, cream cheese, cucumber, green onion, crab, avocado, shrimp, etc. Be sure to slice everything into long thin strips. (Here are several more ideas.)
- Wasabi, optional
- Low-sodium Soy Sauce
- Chopsticks
- Sesame seeds, black and/or white (We use a combo called Tuxedo sesame seeds)
- Pickled ginger, optional
- Yum Yum Sauce, optional
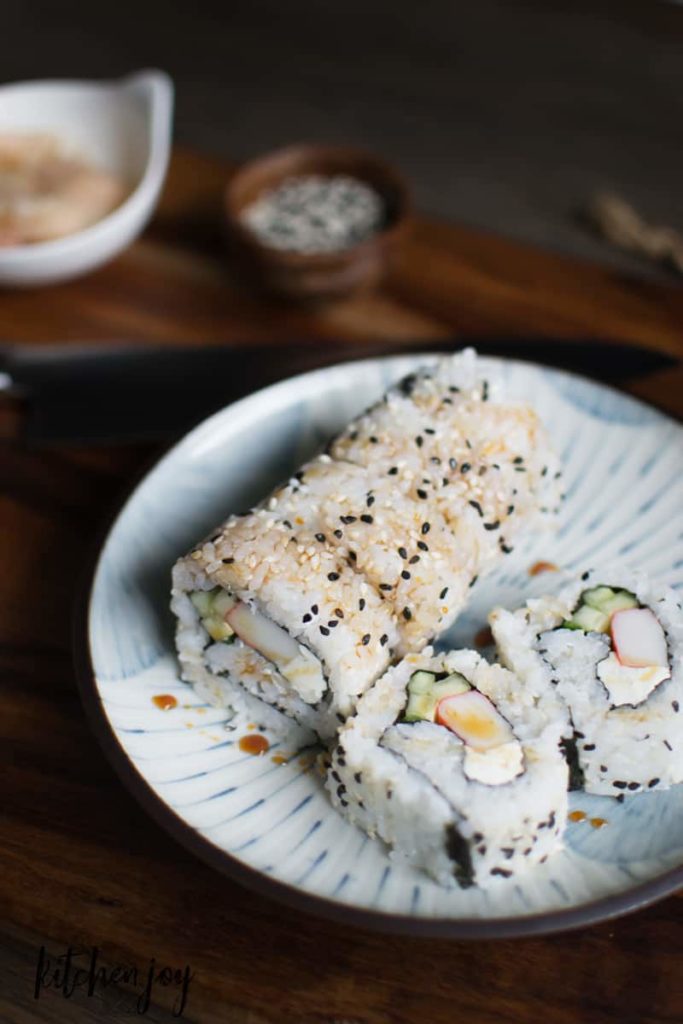
- Eel Sauce (scroll down for recipe)
- Bowl of water for dampening fingers
- Cutting board and VERY sharp, thin bladed knife

2. Lay a sheet of Nori BUMPY SIDE UP on the bamboo mat. One side of the Nori has lines on it, and that is the side that the rice goes on.

3. Arrange rice to cover entire surface of the Nori sheet. Using slightly damp fingers helps to prevent the rice from sticking and clumping to your fingers. The rice should not be in a thick layer, just enough to cover the Nori. The grains of rice will be pressed together as you roll, so it's okay if you see some of the Nori between the grains. (See photos below.) Dip fingers in the bowl of water as needed.

4. Sprinkle with sesame seeds, if desired. We don't always use sesame seeds, mainly because I forget to add them, but I definitely prefer the subtle flavor addition that the black sesame seeds provide.
5. Flip Nori over. Gently flip the rice-covered Nori over so that the rice side is down on the bamboo mat. Gently press down on the Nori to flatten the rice down a bit.
6. Arrange your desired filling ingredients. Start in the very center, and lay your main ingredient (shrimp, crab, smoked salmon, etc) in a horizontal line across the Nori sheet. If using any soft ingredients, such as avocado or cream cheese, lay these ingredients BELOW the main ingredient. Any additional ingredients such as cucumber, green onion, etc. go ABOVE the main ingredient. The reason that it is important for the soft ingredients to be below the ingredients is to help contain the soft ingredient during the rolling process. Be sure not to add so many ingredients that you can't close the roll.

7. Start rolling from the bottom. Gently lift the side of the bamboo mat that is closest to you and bring it just over the top of the filling. Carefully press/squeeze using the bamboo mat to shape the roll. Fold back the bamboo mat as you continue to roll. Once the sushi is rolled, apply even pressure around the roll using the bamboo mat to tighten up the roll.

8. Slice and serve. Transfer assembled sushi roll to a cutting board and slice into several pieces, about ½-inch thick. Drizzle with Eel Sauce and Yum Yum sauce if desired. Serve with soy sauce and wasabi.

A Recipe for Eel Sauce

Eel sauce is a sweet and salty sauce that is easy to make and elevates the flavor of sushi. No eels were harmed in the creation of this sauce. :)
- Yield: About ¾ cup 1x
Ingredients
½ cup low sodium soy sauce
½ cup granulated sugar
½ cup mirin
Instructions
Heat all ingredients in a medium saucepan over medium heat until reduced by nearly half. Sauce will thicken as it cools.
Drizzle over sushi rolls, grilled chicken, fish, or eel.
Thank you so much for visiting Kitchen Joy. It is such a pleasure to share our favorite recipes with all of you. I would love if you subscribed so you never miss a new post!
Comments
No Comments